If you can’t use our PDF to editable InDesign file converter, then how else can you efficiently convert a PDF for editing in InDesign? Perhaps our 25c per page fee is more than you can afford, so you’re looking for alternatives.
This guide walks you through the quickest way, explaining the DIY method in 6 steps.
Before we start, a quick check: if your PDF is a scanned document, so contains a single image, then this guide is not going to help you.
If you have an Adobe Creative Cloud subscription, you might be able to open an editable PDF in InDesign using the new Open PDF feature added to InDesign in 2025.
Are you sure you need to convert the PDF to InDesign? Two potential workarounds are:
A. Placing a PDF in InDesign
If you don’t need to edit the PDF, but simply need to get the PDF into InDesign, that’s easy. Create a new document at the page size and orientation of your PDF, then select File > Place PDF. When choosing your file, check Show Import Options. Then pick the page and page box of the PDF you’d like to place. You can then manipulate the PDF in the same manner as you would an image.
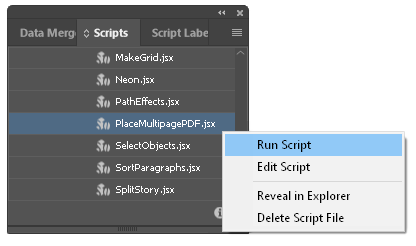
If your PDF contains multiple pages, you can speed up by using the PlaceMultiplePage.jsx script. Find scripts at Window > Utilties > Scripts, then in the Scripts Panel select Application > Samples > JavaScript. Right-click on PlaceMultiplePage.jsx then click Run Script. This will automatically create an InDesign document containing each page of your PDF.
B. Editing the PDF
PDFs are not meant for editing. Despite that you can often make very simple edits to a PDF in Acrobat Pro, and other PDF editors. Such as fixing a typo. If using Acrobat Pro, open the PDF, then select Tools > Edit PDF.
Assuming that the two alternatives above aren’t going to work for you, then you’ll need to rebuild the PDF in InDesign. This is a potentially a six step job (but for some PDFs you’ll be able to skip a step or two).
We’ll tackle them in this order.
Start by adding a reference layer, so it’ll be easy to correctly position the page objects that you’ll import in steps 2 through 6. To do this, create a new layer, place the PDF in a frame on that layer, select the frame and set the transparency to 30%. Now lock the layer so you don’t accidentally select it when you add page objects. Create a new higher layer for the page objects you’ll be adding.
When you start adding page objects, you might need to tweak the 30% value so you can clearly distinguish between the page objects and the reference layer.
Are there areas of the PDF that you don’t need to edit? Such as logos or compliance text. If so, then great, let’s add these as-is. Place the PDF on your InDesign page, then crop and move the frame to fit and position your keep as-is objects. You might end up with several of these scattered about the page. That’s OK, as InDesign does an excellent job of exporting a placed PDF.
We’ll look at paths before other content types, because if you open the PDF in Illustrator you might get lucky and be presented with a perfect representation of all page objects. Probably not. But it has happened for me with simple layouts. Illustrator is of course primarily a tool for manipulating paths (by paths I mean lines, shapes, other vector objects), and will often do an excellent job of rendering the paths while making a mess of the text.
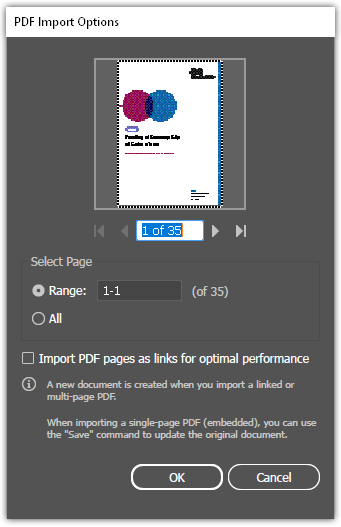
When opening a PDF in Illustrator to access the paths, ensure the option Import PDF pages as links for optimal performance is unchecked, otherwise you’ll be unable to select the individual page objects. You can open all pages (though you might run into memory problems if the PDF has many pages), or open one page at a time.
If Illustrator accurately displays the paths, then you have two options:
A. Edit paths in Illustrator
Copy-paste each individual object into a separate Illustrator file, so you have a unique AI file for each. Then in InDesign, use File > Place to import these Illustrator files. To make future edits to these objects, you’ll need to return to Illustrator.
B. Edit paths in InDesign
Or copy-paste from Illustrator into InDesign. This is a less dependable method for getting Illustrator content into InDesign, but often works well. You can then edit these paths in InDesign.
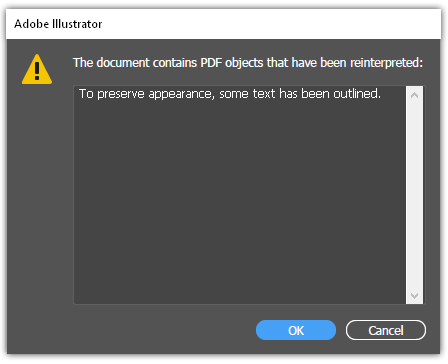
While working in Illustrator, you might get lucky with the text too. But often you’ll get a To preserve appearance, some text has been outlined warning, in which case pasting the text into InDesign will be impossible.
Or you might not get that warning and the text will still be a mess. Even if the text does convert correctly, at best you’ll have to paste into InDesign one line at a time.
There are two alternative methods: copying-pasting from the PDF, or using InDesign’s Word import feature.
A. Copy-paste from the PDF
When you copy-paste text from a PDF, the pasted text won’t retain formatting properties, such as font size. However, if you have your PDF open in Acrobat Pro, selecting Tools > Edit PDF will display basic character formatting values. You can use these as a starting point when you recreate your InDesign text styles. Paragraph formatting, on the other hand, will require manual calculation by adjusting the leading and paragraph spacing until your text matches the reference layer. Acrobat does show leading and spacing values, but I’ve found them to be unreliable.
Be aware that some PDF generators intentionally scramble character order to make copying-pasting tricky. Additionally, each line in the PDF might be pasted in as a separate paragraph. Pasting into TextFixer’s Remove Line Breaks tool can fix this.
B. Export PDF to Word, then place the Word file
If your PDF is text-heavy, then utilizing InDesign’s Word import is usually the best route. With the PDF open in Acrobat, select File > Export To > Microsoft Word > Word Document.
Acrobat’s export to Word usually does a good job of rebuilding paragraphs (a PDF has a no concept of a paragraph object, so the Word conversion routine has to review the position of each line then predict how they should be grouped as paragraphs).
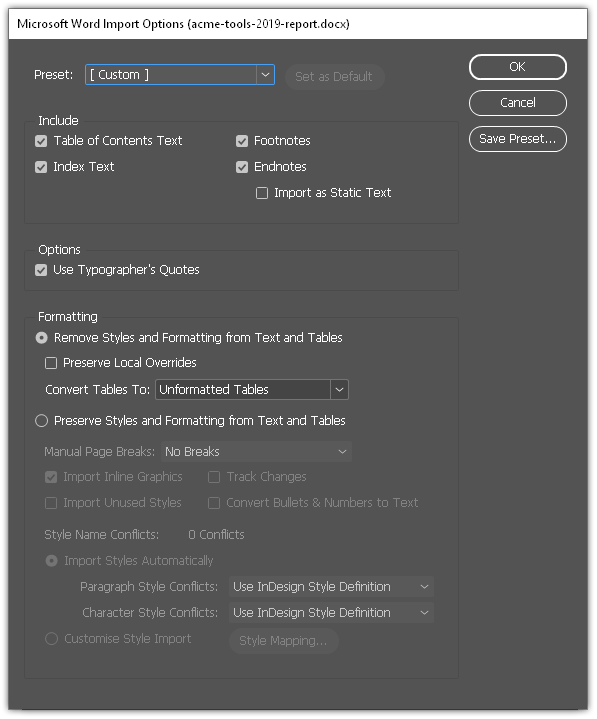
After exporting to Word, to import the text into InDesign, first create a text frame, then select File > Place and choose your Word file. If you aim to place the text without formatting, so you can apply your own InDesign text styles to the imported text, ensure Formatting > Remove Styles and Formatting from Text and Tables is selected. Or if you want to chance your arm with importing formatting and text from Word, you’ll want Formatting > Preserve Styles and Formatting from Text and Tables selected. See which works best for your workflow, I prefer the former so I can add all my styling afresh in InDesign.
A note about paragraph and character styles: no matter how diligent the original author of the document was in creating well organized styles, the PDF file will contain none of this style data. If a Word (or InDesign) file is exported to PDF, then exported back to Word, the text styles in the new Word file will differ to those in the original file (the new Word text styles are automatically generated by the PDF to Word export routine).
PDFs have no concept of a table object. To a PDF a table is instead a collection of paths and characters. So importing tables from a PDF into InDesign is not straightforward, but Excel can give you a helping hand (the success of this method is a bit hit-and-miss).
Begin by exporting the PDF to Excel by selecting File > Export To > Spreadsheet > Microsoft Excel Workbook.
Open the generated Excel file and note the cell reference of the top left cell and bottom right cell of the cells in the table you want to import (e.g. A4:L16). This is your cell range.
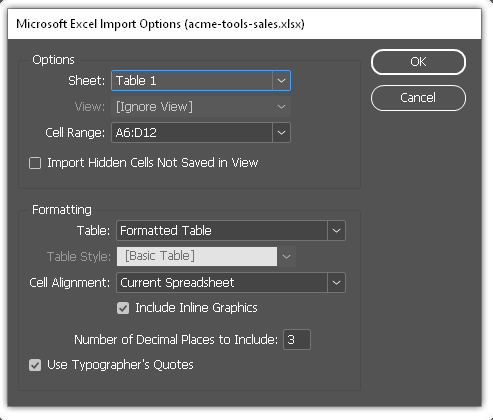
Back in InDesign, create a frame. With the frame selected go to File > Place, choose your Excel file, and ensure Show Import Options is checked. When the import options appear, enter your cell range, and make sure Formatting > Table is set to Formatted Table. Feel free to edit the options in the rest of the formatting set. Clicking OK will generate a table closely (sometimes!) matching that from Excel.
This technique can result in unusual formatting in InDesign. If you’re having problems setting alignment of columns or rows, or finding strange characters in the cells, try reopening the Excel file to make changes to the cell formatting, then saving and placing the updated file into InDesign.
Finally, we come to images. You have two options for extracting the images from a PDF, both quick to complete.
A. Extract images from Acrobat
This does as you would expect, it exports all images from a PDF to a folder, from which you can place them into InDesign. Find Export All Images in Tools > Customize.
B. Extract images from Photoshop
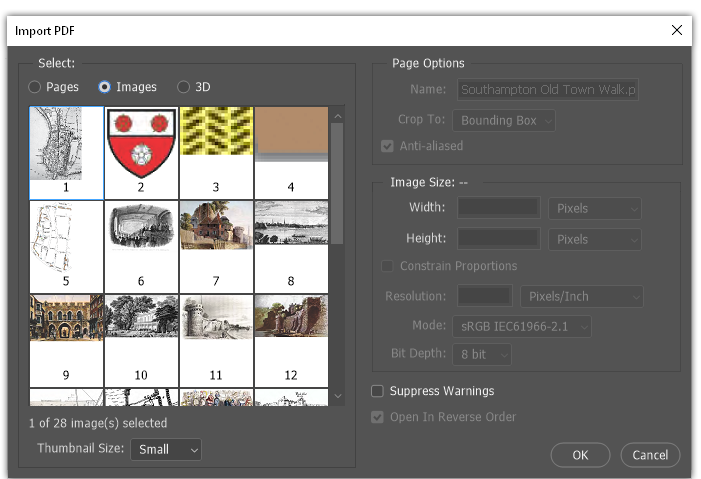
If you plan to edit the images in Photoshop then this is the quicker option, since it opens the images directly in Photoshop. Select File > Open, choose your file, then at the preview step, check Images, to be presented with all the images Photoshop has detected in the PDF.
This guide is designed to save you time when you next have to DIY convert a PDF for editing in InDesign.
Should you opt instead for a file converter to do the job, you’ll nearly always find it quicker than running through the steps above. The file conversion won’t be 100% perfect but the time you save should outweigh the per page cost (we offer your money back if it doesn’t). As well as our converter, other PDF to InDesign converters, which work out cheaper than ours if you need to convert 1,000+ pages, are available from Markzware and Recosoft.
If you can suggest any improvements to this guide, please reach out to me at tom@leguptools.com